Determining the Concentration
of a Solution: Beer’s Law
The primary objective of this experiment is to determine the concentration of an unknown nickel (II) sulfate solution. You will be using a Colorimeter or Spectrometer. The wavelength of light used should be one that is absorbed by the solution. The NiSO4 solution used in this experiment has a deep green color, so Colorimeter users will be instructed to use the red LED. Spectrometer users will determine an appropriate wavelength based on the absorbance spectrum of the solution. The light striking the detector is reported as absorbance or percent transmittance. A higher concentration of the colored solution absorbs more light (and transmits less) than a solution of lower concentration.
You will prepare five nickel sulfate solutions of known concentration (standard solutions). Each is transferred to a small, rectangular cuvette that is placed into the Colorimeter or Spectrometer. The amount of light that penetrates the solution and strikes the photocell is used to compute the absorbance of each solution. When a graph of absorbance vs. concentration is plotted for the standard solutions, a direct relationship should result. The direct relationship between absorbance and concentration for a solution is known as Beer’s law.
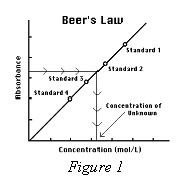
You will determine the concentration of an unknown NiSO4 solution by measuring its absorbance. By locating the absorbance of the unknown on the vertical axis of the graph, the corresponding concentration can be found on the horizontal axis (follow the arrows in Figure 1). The concentration of the unknown can also be found using the slope of the Beer’s law curve.
OBJECTIVES
In this experiment, you will
• Prepare NiSO4 standard solution.
• Measure the absorbance value of each standard solution.
• Find the relationship between absorbance and concentration of a solution.
• Determine the concentration of an unknown NiSO4 solution.
MATERIALS
LabQuest |
two 10 mL pipets (or graduated cylinders) |
LabQuest App |
two 100 mL beakers |
Vernier Colorimeter or Spectrometer |
pipet or pipet bulb |
one cuvette |
distilled water |
five 20 x 150 mm test tubes |
test tube rack |
30 mL of 0.40 M NiSO4 |
stirring rod |
5 mL of NiSO4 unknown solution |
tissues (preferably lint-free) |
PROCEDURE
Both Colorimeter and Spectrometer Users
1. Obtain and wear goggles! CAUTION: Be careful not to ingest any NiSO4 solution or spill any on your skin. Inform your teacher immediately in the event of an accident.
2. Add about 30 mL of 0.40 M NiSO4 stock solution to a 100 mL beaker. Add about 30 mL of distilled water to another 100 mL beaker.
3. Label four clean, dry, test tubes 1–4 (the fifth solution is the beaker of 0.40 M NiSO4). Pipet 2, 4, 6, and 8 mL of 0.40 M NiSO4 solution into Test Tubes 1–4, respectively. With a second pipet, deliver 8, 6, 4, and 2 mL of distilled water into Test Tubes 1–4, respectively. Thoroughly mix each solution with a stirring rod. Clean and dry the stirring rod between stirrings. Keep the remaining 0.40 M NiSO4 in the 100 mL beaker to use in the fifth trial. Volumes and concentrations for the trials are summarized below:
Trial |
0.40 M NiSO4 |
Distilled H2O |
Concentration |
1 |
2 |
8 |
0.08 |
2 |
4 |
6 |
0.16 |
3 |
6 |
4 |
0.24 |
4 |
8 |
2 |
0.32 |
5 |
~10 |
0 |
0.40 |
4. Prepare a blank by filling an empty cuvette 3/4 full with distilled water. Seal the cuvette with a lid. To correctly use a Colorimeter cuvette, remember:
• All cuvettes should be wiped clean and dry on the outside with a tissue.
• Handle cuvettes only by the top edge of the ribbed sides.
• All solutions should be free of bubbles.
• Always position the cuvette so the light passes through the clear sides.
Colorimeter Users Only (Spectrometer users proceed to the Spectrometer section)
5. Connect the Colorimeter to LabQuest and choose New from the File menu.
6. Calibrate the Colorimeter.
a. Place the blank in the cuvette slot of the Colorimeter and close the lid.
b. Press the < or > buttons on the Colorimeter to set the wavelength to 635 nm (Red). Then calibrate by pressing the CAL button on the Colorimeter. When the LED stops flashing, the calibration is complete.
7. Set up the data-collection mode.
a. On the Meter screen, tap Mode. Change the mode to Events with Entry.
b. Enter the Name (Concentration) and Units (mol/L). Select OK.
c. Proceed directly to Step 8.
Spectrometer Users Only
5. Connect the Spectrometer to LabQuest and choose New from the File menu.
6. Calibrate the Spectrometer.
a. Place the blank cuvette in the spectrometer.
b. Choose Calibrate from the Sensors menu. The following message is displayed: “Waiting … seconds for lamp to warm up.” After the allotted time, the message will change to “Warmup complete.”
c. Select Finish Calibration. When the message “Calibration completed” appears, select OK.
7. Determine the optimal wavelength for creating the standard curve and set up the data-collection mode.
a. Remove the blank cuvette, and place the 0.40 M standard into the cuvette slot.
b. Start data collection. A full spectrum graph of the solution will be displayed. Stop data collection.
c. The wavelength of maximum absorbance (λ max) is automatically identified. To choose a different wavelength, tap the graph (or use the ◄ or ► keys on LabQuest).
d. Tap the Meter tab. On the Meter screen, tap Mode. Change the mode to Events with Entry.
e. Enter the Name (Concentration) and Units (mol/L). Select OK.
Both Colorimeter and Spectrometer Users
8. You are now ready to collect absorbance-concentration data for the five standard solutions.
a. Start data collection.
b. Empty the water from the cuvette. Using the solution in Test Tube 1, rinse the cuvette twice with ~1 mL amounts and then fill it 3/4 full. Wipe the outside with a tissue and place it in the device (Colorimeter or Spectrometer).
c. When the value displayed on the screen has stabilized, tap Keep and enter 0.080 as the concentration in mol/L. Select OK. The absorbance and concentration values have now been saved for the first solution.
d. Discard the cuvette contents as directed by your instructor. Using the solution in Test Tube 2, rinse the cuvette twice with ~1 mL amounts, and then fill it 3/4 full. Place the cuvette in the device, wait for the value displayed on the screen to stabilize, and tap Keep. Enter 0.16 as the concentration in mol/L. Select OK.
e. Repeat the procedure for Test Tube 3 (0.24 M) and Test Tube 4 (0.32 M), as well as the stock 0.40 M NiSO4. Note: Wait until Step 10 to test the unknown.
f. Stop data collection.
g. To examine the data pairs on the displayed graph, tap any data point. As you tap each data point, the absorbance and concentration values are displayed to the right of the graph. Record the absorbance and concentration data values in your data table.
9. Display a graph of absorbance vs. concentration with a linear regression curve.
a. Choose Graph Options from the Graph menu.
b. Select Autoscale from 0 and select OK.
c. Choose Curve Fit from the Analyze menu.
d. Select Linear as the Fit Equation. The linear-regression statistics for these two data columns are displayed for the equation in the form
y = mx + b
where x is concentration, y is absorbance, a is the slope, and b is the y-intercept. Note: One indicator of the quality of your data is the size of b. It is a very small value if the regression line passes through or near the origin. The correlation coefficient, r, indicates how closely the data points match up with (or fit) the regression line. A value of 1.00 indicates a nearly perfect fit.
e. Select OK. The graph should indicate a direct relationship between absorbance and concentration, a relationship known as Beer’s law. The regression line should closely fit the five data points and pass through (or near) the origin of the graph.
10. Determine the absorbance value of the unknown NiSO4 solution.
a. Tap the Meter tab.
b. Obtain about 5 mL of the unknown NiSO4 in another clean, dry, test tube. Record the number of the unknown in your data table.
c. Rinse the cuvette twice with the unknown solution and fill it about 3/4 full. Wipe the outside of the cuvette and place it into the device.
d. Monitor the absorbance value. When this value has stabilized, record it in your data table.
11. Discard the solutions as directed by your instructor and proceed to Step 1 of Processing the Data.
Processing the data
1. To determine the concentration of the unknown NiSO4 solution, interpolate along the regression line to convert the absorbance value of the unknown to concentration.
a. Tap the Graph tab.
b. Choose Interpolate from the Analyze menu.
c. Tap any point on the regression curve (or use the ◄ or ► keys on LabQuest) to find the absorbance value that is closest to the absorbance reading you obtained in Step 10. The corresponding NiSO4 concentration, in mol/L, will be displayed to the right of the graph.
d. Record the concentration value in your data table.
2. (optional) Print a graph of absorbance vs. concentration, with a regression line and interpolated unknown concentration displayed.
DATA and calculations
Trial |
Concentration (mol/L) |
Absorbance |
1 |
0.080 |
|
2 |
0.16 |
|
3 |
0.24 |
|
4 |
0.32 |
|
5 |
0.40 |
|
6 |
Unknown number ____ |
|
Concentration of unknown |
mol/L |