|
Home | Programs | Contact | News & Events | For Parents | For Students | VI Resources | Photos |
||||||||||||||||||||||||||||||||
|
|
||||||||||||||||||||||||||||||||
|
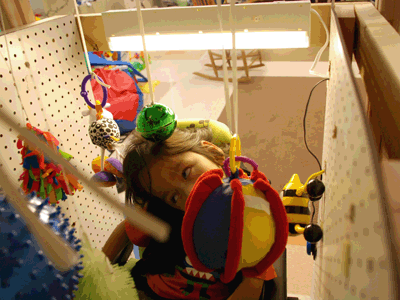
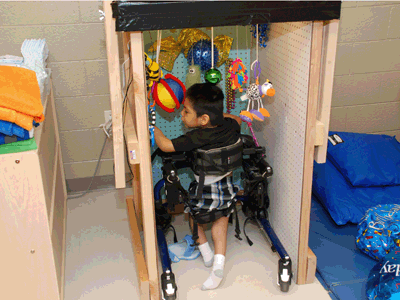
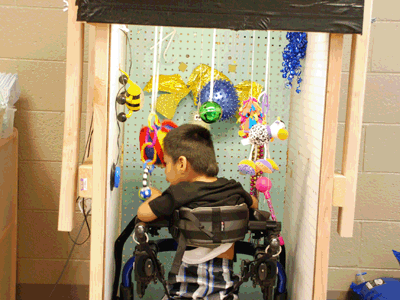
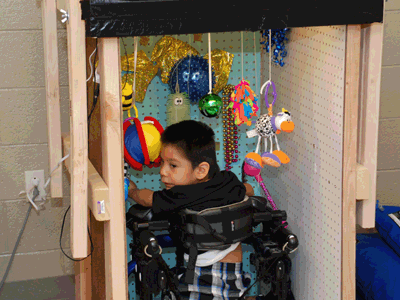
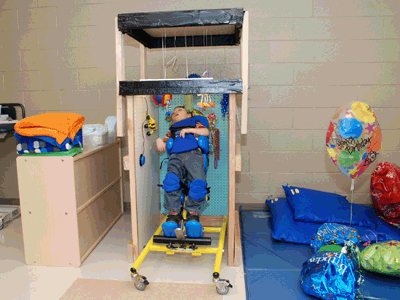
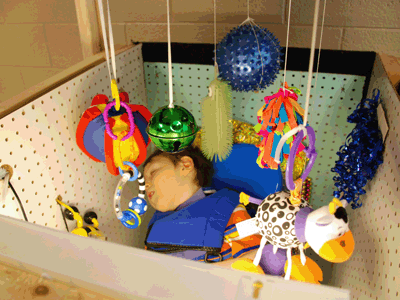
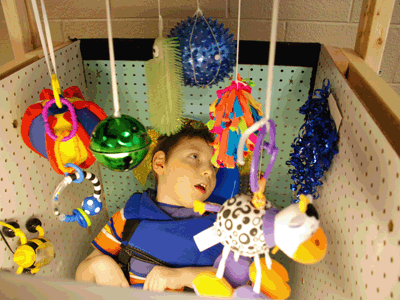
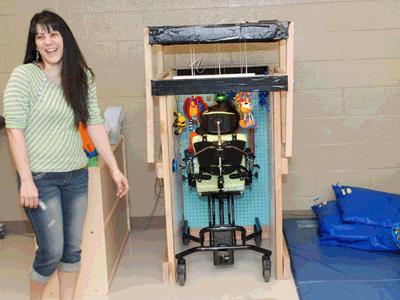
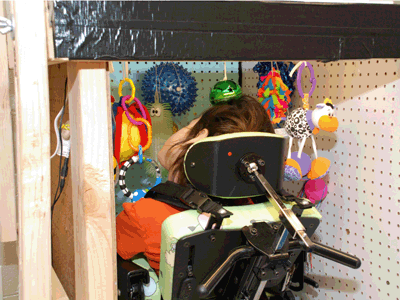
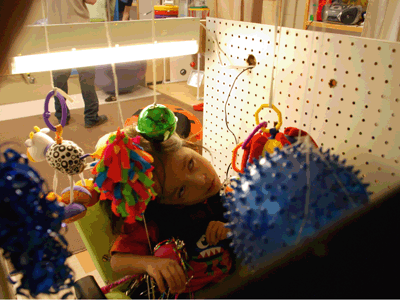
The defining feature of the Tall(er) Room is that it is tall and can get taller. A teacher with a single student who is appropriate for the Tall(er) Room can use it with that student in a wheelchair or gait trainer or stander or stroller or Rifton chair. A teacher with multiple students who are appropriate for the Tall(er) Room can use it with a student in a wheelchair, a different student in a gait trainer, another student in a stander and so on. Instead of adjusting the length of the lines that suspend the objects around the student individually (a time consuming process), the roof itself is raised or lowered to allow for student access. TVIs have long adapted the Little Room to meet the needs of students in wheelchairs by extending the vertical posts. As TVIs tend to build Little Rooms out of PVC, the vertical posts are themselves PVC. At a certain height, about 4’, the PVC begins to have stability issues. This is particularly true if the student in the Little Room is prone to wild movements. Student safety can become an issue in a tall PVC version of the Little Room. As such, the Tall(er) Room is constructed primarily of 2x6s and 2x4s. The wood construction, while more difficult to build than PVC and significantly heavier, is much more stable. Also, the more robust construction allows for larger and/or heavier items to be used. The Tall(er) Room is, essentially, a four foot tall by two foot wide by three foot deep (measurements can be varied to meet student needs) rectangle. The roof is constructed of 2x4s and sits on top of the base. Four posts, two on each side of the Tall(er) Room, are affixed to the roof. Bolts hold the four posts to the base of the Tall(er) Room both to ensure that the roof stays directly above the rectangle that forms the base and to lock the roof into the desired height. The nuts on the bolts are loosened, the height of the roof set to the desired level and the nuts on the bolt are then tightened. Raising and lowering the roof is most easily done by 2 people, one on each side of the Tall(er) Room. Pegboard has been used on the sides and top of this Tall(er) Room to allow for innumerable attachment points for toys, switches and so forth. Because the pegboard lets in a limited amount of light it can be quite dim when the roof is directly atop the base. A cheap light (plug in—placed behind the student) was added to enhance the illumination when the items weren’t self-luminous. (Light up toys stand out much better in the darker environment and the plug in light can be switched on/off as needed.) The Tall(er) Room could be constructed with plexiglass on top instead of pegboard to allow more overhead light to enter. Darkening the inside of the Tall(er) Room would then only require the placing of a blanket over the plexiglass if the student functioned best in low lighting or needed indirect lighting. As a note of clarification, the Tall(er) Room is not meant to replace or displace the Little Room. The two are seen as complimentary. A student may be placed in the Little Room and benefit from the resonance board and freedom of movement being supine often allows. The same student may then be placed in the Tall(er) Room to experience a different plane of motion while supported or standing. Educators: Please feel free to construct and use this device at your discretion. However, NMSBVI assumes no liability regarding this innovation or its use/misuse.
For additional information, please contact the inventor, Ron Later, at
rlater@nmsbvi.k12.nm.us
The sides of the Tall(er) Room are comprised of two vertical posts (4’ 2x6s) and three horizontal supports (3’ 2x6s or 2x4s). The back of the Tall(er) Room consists of three horizontal supports (2’ 2x4s) that connect the two sides. The roof is made of 4 pieces of 2x4, cut to fit over the base of the Tall(er) Room. The four vertical posts extending down from the roof are pieces of 2x4s. Each of those posts has a ˝” groove cut into it to allow it to slide up and down while it is retained by a bolt. The four bolts that hold the roof are trapped (by the pegboard) and extend through the vertical post of the base and through the vertical posts attached to the roof. The roof, therefore, can’t accidently fall off of the base; either the vertical posts extending from the roof must be removed (unscrewed) or the pegboard that traps the bolts must be removed (unscrewed). Pegboard was used because it is versatile, cheap and happened to be on hand when the Tall(er) Room was constructed. As noted in the section above, other materials – such as plexiglass – could be used instead of pegboard. The sides of the interior of the Tall(er) Room could even be made of cardboard if that suited the needs of the students and program. Trapping the bolts that hold the roof to the base is highly advisable (cardboard won’t do it) given that the roof isn’t light; staff or student injuries could result if the roof were to fall off of the base. The roof could be made lighter by constructing it of 1x4s instead of 2x4s. Even then, trapping the bolts would be prudent.
|
||||||||||||||||||||||||||||||||
|
|
||||||||||||||||||||||||||||||||
| Serving the Youth of New Mexico and Their Families since 1903 | ||||||||||||||||||||||||||||||||
| Please read the
Terms
And Conditions Of Use
carefully before using this site. If you do not agree to these terms and conditions of use, please do not use this site. Comments to: webmaster@nmsbvi.k12.nm.us Last Updated: 4/2/2012 |

